tirsdag 17. mars 2020

The internal innards of the M6

You might not know the exact feeling, but I'm sure it's possible to understand most parts of it anyway.

Not exactly the way you like to see one of your best cameras, but still it had to be done...

When you're stuck at sea due to the world changing by the hour, it is of course very nice to have your camera ready to shoot a few holes in the air every now and then. 
Eventually the moment comes when your film has reached the end, and you do the same trick you're well used to after having hundreds of rolls going through that very camera. You simply start rewinding the thing. Then, after a couple of turns on the crank, an ugly sound and everything is totally jammed. Nothing is moving either way, and it starts to sink in that even the germans seems to have managed to build something that would break some day if pushed long enough. 

Well... as mentioned above, stuck at sea and of course no service technician available unless you got confidence enough to trust the good old "put your Leica inside a bottle and throw it overboard" sort of mail system. Looking down the ships side at the direction of current I soon discarded that option.
As we got the house full of engineers down in the lower part of this vessel, I could do nothing less than bring the tiny tools out on the desk and start the demolition of the camera to try figure out what might be wrong in there. 
I know, I know... red alarm lights flashing and the "don't do this at home" and all of that sorts! It's not something I recommend, but then again what can you do when you're on board, way out at sea, and with no return ticket back home? I might be stuck here for months for all we know. Think about that! That would be a long time just looking at a jammed Leica, I'll tell you that much. 

After a few hours of just looking inside at wonderful german stuff and engineering you'll get a fair insight into what's supposed to go on anyway, but still you don't want to dig too deep into it at first, trust me! When the top cover had been removed I used a lot of time to try figure out what might have gone south, even though it was quite obvious it had something to do with the film transport and wind-on stuff. I used some time on the internet as well to hopefully get a clue, but no real help to find there. Must be a repair manual or at least a drawing available somewhere? Well, google showed me nothing much but a few posts in forums suggesting the people facing the same problem had loaded their film wrongly or had forgotten to release the film drive sprocket wheels or whatever. That was not my case, at least I know that much.

See? In there somewhere there was trouble in the gears and stuff...

Anyway, after a few hours of tweaking, jacking, pointing, talking, some swearing and a little bit of sweating I had the problem fixed. The shutter and the film transport were totally out of sync, and after tweaking a sprocket wheel and doing adjustments to that little thing to make everything aligned I once again had a working camera.
Actually I think I had the problem fixed a bit earlier, but due to a stupid second fault I probably had introduced myself I couldn't find the problem. It took a good walk out on deck and then digging into the thing again before I suddenly realized I might have got something inside the shutter button out of alignment. So when punching the little pin inside the button used for the good old wire release it suddenly worked as it should, and the way I thought it would way earlier in the day. 
Turns out that the release button on the M6 is a very precisely machined little thing, which you don't actually realize until you have put your very strong glasses on. It needs to be mounted just the right way, or it will not function at all that little rascal. 
Well, when you look back on it almost 24 hrs. later it's OK, because that's the way we learn, isn't it? I just wish I had realized a loupe would be helpful a few hours earlier...

Front end. Only some cleaning now, and we were done for the day. 

And heck! I even managed to give the old thing a little internal clean-up as well, as the innards had some light shining on them for a few hours anyway. Seems like time well spent if you ask me. It feels a lot better now, so let's hope it works well in the years to come. 
We will soon find out anyway, because a new film was put inside this afternoon. 
I'll keep you informed. 

See how well it worked only a couple of hours before the big hick-up? It's one of the heroes in the mess department getting ready to wash the floor for the third time that day...

Oh yes, that's how happy you'll get being a sailor, traveling the world and see the sun every day :))

Meanwhile up there in the thin air around the wheelhouse there is painting going on. It might not seem so, but we're talking bright yellow here. Ship yellow, you know, so it's bright believe me!

fredag 13. mars 2020

Fomapan 400 - I might have figured it out, finally

OK, I agree that the title for this post is quite an optimistic one. Still, I have been thinking about how to attack Fomapan 400 film for some time now. I feel I have never really got under the skin of it, and that my negs have been quite far from well exposed almost no matter what I have been trying to do with this film.
So, yesterday I thought what the heck and decided to just as well put it through some real funky process.
I threw a roll inside the Rolleiflex and decided to over expose it, and then (as if that wasn't enough...) also to over develop it to some extent, just to see what that would bring to the table.
Some time ago I read a few words about folks who had done something similar with a roll or two of HP5 with good results, but as usual I couldn't find the article when I needed it. I know they both over exposed and over developed their film, but I'm not sure by how much.

This is Mr. Thor-Ole, the first engineer on board. He knows a lot about stuff and anything going around and around. That's nice skills to have when being an engineer of course.

So what I basically did was to decide to expose the film to 100 ASA. That should give us two stops of over exposure, done directly in camera.
The film were shot down in the engine control room of the ship, with some rather bad lighting as we have seen before from countless snaps taken down there. I used a phone app to measure the light and ended up at 1/8 sek. wide open lens at f/2,8. 
Of course, that's the stupid part of it, as it's completely taking away the speed advantages of using a 400 film in the first place. The case is that this film seems not to be a 400 film at all, which I have been thinking for quite a while actually. Usually my Fomapan 400 shots will end up dark, muddy and extremely grainy. Not so this time though, as you might see from the examples.

Meet Jøran, the Cadet of the engine department. He's probably telling his mother or whoever all about the life on board while waiting for news about when he can possibly get home from this place.

And as if the two stops of extra exposure wasn't enough I also decided to give it about two stops extra in the developer as well.
According to the Foma data sheet the Fomapan 400 in Fomadon Excel (1:1 mix) should have 9,5 minutes in the tank, so I almost doubled that ending up at around 17,5 minutes just to see if something weird might happen.

I might give it another go some other day. Shoot it at around 200 ASA and give it more or less the same time in the developer. That might do the trick... we will see. It would be great to earn one stop if nothing else.
I might even try to shoot it at say 320 and give it another stop or so in the developer as well. There could be several ways to get more or less the same result for all I know. 
What I'm after is simply a better way to use the Fomapan 400 film, as I quite like it but not the way I usually would consume it. 

The second engineer in for a short break. He is using his phone as well, but most likely to search the internet for spare parts for one of his very many old reel to reel tape machines. He's collecting them, you see. Will need a big house some day this young man.

What I can say straight away is that my negs here looks very much printable, and that my typical shadow issues seems to have been gone with the wind. There are bad spots for sure, but nothing like they used to be. For the first time I think I might say there seems to be details in the shadows. 
They might look a bit flat or with some loss of contrast, but then again the "scanning facilities" are still not up to par as you might remember, so it might not be as bad as it looks here.

Next film up for the treatment is the Ilford PAN 400 film. There's one already loaded inside the M6 rangefinder. I have even put batteries inside to be able to use the meter! I adjusted it to 200 ASA and will decide later on how much to stretch the development. There might be a conclusion some day... so stay tuned. 

I mean you have to put your mind into something else when it seems you might be sitting around here for quite a while... 

See that? That's the electrician and the last one working in my department, and he's on his phone as well. What is it with people and phones today and the times we live in? Well... I think we might be excused to some degree. We live well over half of the time away from our dear ones, and some sort of contact is always nice to have. The electrician is the experienced sailor among our team. He's been doing this since the quite early 70's or something like that, AKA "the stone age" to the younger lads among us...


torsdag 12. mars 2020

Oh yes, I have been waiting for this the last couple of days...


I'm over here, as you might know. Over the sea, in the USA. Not where the picture was taken obviously, as I'm actually about 250 nautical miles out in the Gulf of Mexico at the moment. The snap was taken on-shore, as there's nothing much to see right here but the ocean and a ship or two every now and then. 

They just closed their borders to the USA they did. Due to the damn virus spreading fast, which I got no problems of understanding of course. 
What is worse is that I'm here and have no way of getting myself back over to what I call home as I obviously can't get my back to back over from Europe and on board the vessel when the day of crew change come in less than two weeks from now. 

There is no way of telling for how long this is going to stay this way, and there is no way of telling what the folks responsible at the office and such is going to do with this tiny little issue. For them it's only a question of cost and money, of course. For me it's a bit different... 
We might be able to go somewhere else when the job is finished weeks from now, but by then I guess every border to every country will be closed, which would mean I'm here until the situation has been stabilized. How long is that, you think? A year? Less? 
I might exaggerate, I see that now. But it's hard not knowing, I tell you that much. 
I got things to do at home as well, you see... Life is more than just work. 

Thanks heaven I brought on board a lot of film and quite a bunch of developer for this trip. 
I might have a brand new series started right here and now.

To be continued!

When you couldn't care less...


This was snapped just prior to this one. Same place, same day. With a good 85mm Nikkor lens wide open on some half decent film and all.

He didn't care much about the fuzz at all, the dog called Scot. 
Not even too much about the cat he knew was somewhere close. It was a warm day on the 17th of May in 2019. 
Unlikely I know, but still I kid you not!

onsdag 11. mars 2020

When you're about that age


A zillion things to wonder about, and questions to be asked.
A bunch of strange answers coming in return. 
A hard time sorting out what sounds logic, and what's definitely not. 

Nothing much else to do but prop a flower in your ear then, and ask again if required...! 

tirsdag 10. mars 2020

The Rolleiflex 2.8E in practical use


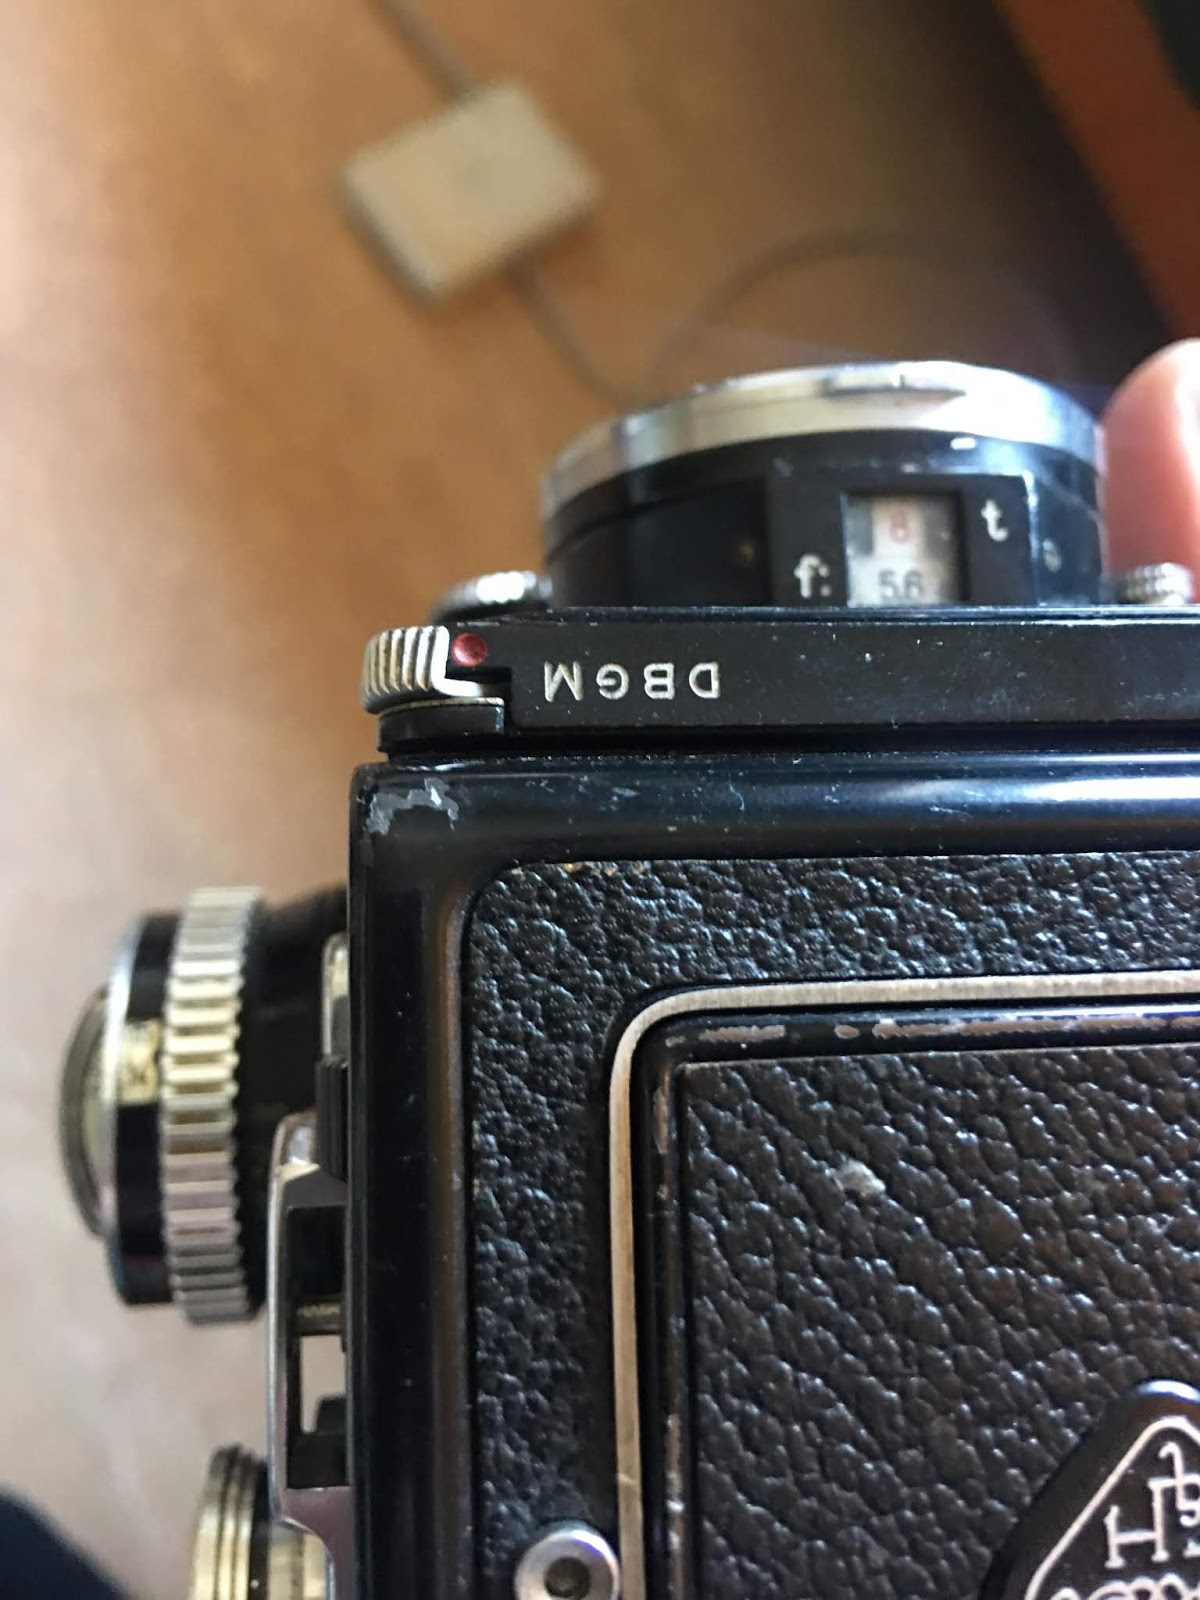
The legendary Rolleiflex TLR, here in version E. Still very much a capable camera today, even though well over 60 years has passed since this box of metal and glass went out of the Francke & Heidecke factory in Germany. 

I know, I know... Another way too long and tedious post. 
I am, as you very well know by now, not much of a camera tester or by any means any good when it comes to writing very wise and accurate stuff about any camera I got, but sometimes I write a few words on things like this anyway. 
And when I do, it's hopefully a more practical view of what the camera is like in daily use, rather than explaining all the bits and pieces, the bells and whistles. Not that there usually is a lot of that stuff on any of my cameras when I start thinking about it. This post is probably a bit more "into the deeps" than usual, but mostly due to the built-in light meter. There would also probably be way too many more or less "instructive" digital photos in this post as well, but you may skip them if you like. A few and maybe even more interesting snaps taken with the actual camera is mixed in between it all. 
Just a few words on the B&W pictures:
These were all shot, developed and processed to the digital version on board the ship I work just a couple of days ago, and only made for the purpose of this blog post. All were done on a roll of Ilford FP4 film within a time frame of about half an hour during a quick walk around the upper and front parts of the vessel. The film was developed in Fomadon Excel 1:1 solution just before dinner, then hang to dry for a couple of hours in the drying room (aka the switchboard room) before it was "scanned" on top of our brand new (made while the film was drying) makeshift "light box" using a simple iPhone camera and some partly fancy phone software to turn the negatives into positives. Please keep all this in mind when you really start feeling the urge to throw in comments about weird shadows and stuff on the negatives. I know they are there in plenty, because the light board patent using the phone is not good enough for commercial work yet, and will of course never be. The "scans" are no good at all, and in particular the highlights lack a lot, but I couldn't get them any better with the very limited equipment we got on board. However it is really great to be able to produce results like this and have them posted on the internet from raw film about 250 nautical miles off shore.

Another thing to keep in mind is the fact that I primarily write this post just to give my mate over there in Northern Ireland a few good reasons why he would never need to buy one of these cameras :)

Enjoy!

Here it is from the other side where they found room for the light meter and the focus adjustment.

I have owned my Rolleiflex for some years now, and quite a few films have been spooled through the thing since it came my way. It was already quite well used when I got it, but not what I would call worn. No dents or anything (believe it or not...) and the glass looked just as pristine back then as it is today. It came straight out from having been serviced and lubricated, so hopefully it will still work fine for a few years yet.
Records shows it was built around 1957, sporting a very nice Carl Zeiss 80mm f/2.8 Planar taking lens. The view lens also seems to have been given some sort of attention back in the days, as it's a f/2.8 80mm construction bearing the lovely name; Heidosmat.
A Syncro Compur shutter lives it's quiet life inside the taking lens, capable of controlling anything between 1 to 1/500 sec. shutter times in addition to the B setting.
The release button is logically placed at the front right of the camera, and it's possible to lock it if you like. I actually recommend to do just that if you're walking along with the shutter cranked.

Heading towards end of work for this day. Relaxing on the bridge wing in the heat of the sun.

As most people reading a blog like this would already know, you will get a small bunch of 6x6 cm negatives out of this camera, and you're supposed to load it with 120 size film. I know you can get a 135 kit for it as well, but I have never even been thinking about buying one to be honest. In these times when you obviously can build more or less anything if your got a 3D printer, you can of course also produce the needed bits to load your 135 roll inside the Rolleiflex should you so wish.

This machine means business, and you will probably notice the cameras presence even well before the very moment you pick it up, feeling the weight and balance of it, and not to speak of when you're having a real deep glance into it's front with the two lenses and the two wheels made for adjusting your aperture and shutter times. Still it's a pretty small, anonymous and stealthy camera even though it's a medium format device. 

When opening the viewfinder cover you find the ground glass to be nice and bright and having a good view of the surroundings in front of the camera. The mechanism for the viewfinder cover is actually worth a study of it's own (said the engineer inside me), as it's not only extremely nice and tight and snappy in all it's joints, but mostly because of the genius way they made the loupe hide so nicely, and how unbelievably easy it is to flip it up for use. And then it's of course the horizontal part of the viewfinder which opens the back and front side of the whole chimney for you to see straight through it, and not to speak of the little hole with the horizontal loupe inside to check focus when operating the camera from this position. And if that's not enough, then to actually close the horizontal viewfinder when no longer needed... Well, there's no need for me to go on about this. You should actually just try it for yourselves to understand what I'm talking about.

The Chief Officer is just off watch and will usually grab an hour or so in the sun with a good book prior to going to bed. At midnight he will be back on watch. 12 hrs. on and 12 hrs. off, every day for six weeks until it's time to get home to the family and all the other good things happening in his other life.

Oh, and then you can of course hide some film inside the dark parts of this camera as well.
To do so you obviously need to open the back, which is done from the bottom of it. While you're turning the camera upside down anyway you may at the same time notice there's the standard threaded hole to put it on top of a pole with three feet and a screw, and there's also four tiny small bumps to make sure the camera will stay sort of securely on it's shelf when putting it to rest for the evening. The four tiny feet has been carefully made on a very small german lathe at some point in time, I think. But I'm not going to hover too much around that.

The bottom part of the camera looks like this. To open it up simply turn the disc in the direction of the arrow and pull lightly on the tab to release the lock.

To have it opened to put film inside you just need to swing the bit with the arrow in the direction of the arrow itself, and then pull the tab to unlock the safety hitch before you slowly pull it open. Easy as heck! 
You can even remove the back cover by moving a little sliding tab a tiny tad, and off and away the backplate goes for easier access to the inner parts of the box.

Lift the tiny tab on the right side of the hinge to unlock the hinge itself. It will make loading of film a bit easier, but it is not much of a problem to load the film without using this trick. 

There you go... easy access to whatever you may need to get done inside the camera. 

Film loading is very simple, and can be done in two ways. The right way or the wrong way. You will of course choose the wrong way first (due to good old Murphy and all that...). A giveaway sign that the film has not been loaded correctly would be the film advancing crank will not stop at the first frame as it should, but rather go on and on until the entire film has been moved over to the take-up spool, which will of course call for the need to go inside the darkroom to re-spool it before you load the film the right way ever since.
To actually save you the hassle I'll show you right here and now how the film is to be thread. It's going under the first roller and over the others. See...? I told you it was easy, didn't I? Have a look below.

So, the trick is obviously to pass the film underneath that first roller.

When the film has been attached to the take-up spool it's just a matter of cranking a few turns until the starting point of it is aligned with the first aluminium bar, then shut the cover and crank further until it stops. Some say you can start with the arrow wherever... I don't know, because I have never tested it out. It actually suits me fine to stop right there.

Anyway, we're ready for the fun part and the real reason to have a camera like this available on your shelf. We're going to take a few snaps and see what they look like. They will look absolutely fabulous, I promise!
Before we get there I need to tell you there is a light meter built into this version of the Rolleiflex. I think it was the first model with a meter, but it's not exactly the most intuitive one out there. Just saying.
It works of course, because everything on a Rolleflex works, it just takes some effort getting used to.
There are two sensitivity settings for the light meter. One for the less and another one for the more lighter conditions. When to use the first or the latter will be given away automatically as the tiny black needle will peak out if there is too much light when the meter is in the "low light" setting. Simply whack the knob on upper left and you go to "light" conditions. 

See that little slider up there at the left? That's the one to use if you need to change sensitivity on your light meter. When you see the red tab you need to read from the red scale down at the light meter. Red point means less light mode.

Red scale for low light readings, not in use for this example...

When this is done you simply turn the outer part of the focus wheel to align the red arrow over the tiny grey one. Then you read the number showing in either the front or the back (red) window on the focusing knob (get your glasses out before you start...). Check the front one if you're in lightly conditions, or the red one if your light meter is adjusted to low light. 

Light conditions scale (reading between 13 and 14 in this example) but we can see the red and grey needle is not perfectly matched yet, meaning the outer chrome ring needs to be adjusted a bit more to have them aligned. 
 
Needles are aligned (OK, just sort of, but anyway), and we have a reading of something between 14 and 15 which should be good enough to get you in the area of a good exposure. Now the only thing you have to do is to have the numbers transfered to the shutter/aperture adjustments at the front of the camera.

When you got a good reading you need to transfer it so the tiny arrow at the front of the shutter time wheel is pointing at the number we just determined from the light meter reading. Then, if you like (and if you are not completely dizzy by now), you can interlock the shutter time wheel and the aperture wheel to be able to get perfect exposure no matter what combination of the two you like to use, but it has to be inside the limits of what's practical possible of course. You may also like not to bother doing this, as it is a bit restrictive for the next snap given the change of light and all other conditions of the area you may live.

Here we are! The arrow at the shutter time wheel is aligned with our number from the previous picture (between 14 and 15, but very hard to see in this picture) and we should have everything in place to get the exposure right. If you look over at the other side for the other thumb wheel (aperture adjustments) there's a strange symbol in the middle of the wheel. That's where the interlock between the shutter and aperture wheel is.

The light meter is a simple selenium cell thing. Mine still works absolutely fine even though as we know it's been sitting there for well over 60 years now.
You can also use a simpler light meter if you wish, or just go completely crazy and go for Sunny 16 or whatever version of the rule you prefer. You will of course get great pictures no matter method of metering you choose to use.

Inside the bridge. The Second Mate is sharing his watch with the First Mate having one hour in and the next one out of the DP (Dynamic Positioning) chair from where the vessel is controlled when we are in operation and working with the ROV's in the water. 

I think I once wrote something like "there's always at least one annoying thing with every camera", and this also goes for my Rolleiflex. Or, I'm not too sure if it's me old eyes starting to fade a bit, but the fact is the split image in the center of the ground glass (at least on my version of it...) is so tiny i can't properly focus on it without using the loupe, or at least some very good reading glasses (which will never there when you need them anyway).
I will soon have to admit I'm getting to the age where some distance is needed to focus them things placed in the front end of my face, and when my arms are fully stretched the distance to the split screen is too far to see the focusing aids inside there at all. Anyway, the loupe is there to be used, and it's not needed for all shots to be honest. After all it's a very small issue, and nothing that is keeping me away from using the camera at all.

In addition to the Engine Cadet down in the dark parts of the vessel there's also one of the same sorts up there in the light. This is what he looks like. No boiler suit or anything up there, of course. 

A number of good reasons (12 to be precise) to still use this old camera really comes to mind every time you have a roll of film from it developed.
The old Planar lens is quite punchy and contrasty for it's age, and have been producing great negatives on whatever film I have decided to put inside the camera through the years I have owned it. Starting to think about it I think I never have tried to feed a roll of any colour film through it though, but that may change quite soon as I got a few rolls of the sort on board the ship at the moment. I can just as well give it a go to check what it's like with some modern C-41 process film with colours.

And of course there have to be some company hiring the ship. This bloke is called Michael. He is a great guy by all measurable means, lives somewhere in the swamps of Louisiana and is representing the client on board. Eight seconds prior to having his portrait taken he had  finished off something like 60 push ups with his feet one meter up on the ship railing. At least he could have tried to look like his pulse was a little bit higher than when at rest, but he didn't...

I don't know if a conclusion is needed or even wanted, but I'll go for it anyway. 
The old machine has it's quirks and moments where you think that this is just old fashion and too bothersome to play around with in 2020. If you are in need of a coupled light meter and automatic exposure, or in fact a decent on-board light meter at all, maybe the Rolleiflex is a bit too far out and a bit too cumbersome to actually be of any great value to you. 
On the other hand if you are a little bit experienced and usually will have no big issues in normal light conditions guessing exposure, or if you got a handy light meter to bring along for those situations when it's actually needed, then this type of camera might be just the right thing for you if you're looking for a handy medium format camera shooting squares.  
The negatives coming out in the other end of this box is really great, and the size and form factor of the camera is truly a joy to play around with. 
Another brilliant thing with the Rolleiflex is that the lens is securely attached to the camera, hence no money at all going down that extremely huge drain we all know too well.

I really recommend the Rolleiflex, I do. At least for anyone living a fair bit away from Northern Ireland and thereabouts not having a Hassy or something from before, as the resulting negs probably would be more or less similar. 

onsdag 4. mars 2020

Some thoughts around the Olympus Pen EE-3

I just had a good read of this nice little blog entry starring the lovely Olympus Trip 35 a couple of days ago, and thought I'd just as well throw in a few thoughts about the tiny little sister of the Trip 35, in other words; Meet the wee little Pen EE-3.

A lovely little thing it is with no problems fitting inside the palm of even a smallish hand.

It's actually one of very few film cameras I have bought at a physical store in my life, as this little gem and also my first SLR was payed for over a counter. A Nikon F-401 was bought brand new some time in the mid to late 80's, and the Pen EE-3 was bought only two or three years ago well used but very far from worn out, from a shop dealing with second hand cameras in Arundel, South Downs in West Sussex over in England during "the almost never ending road trip" with the old LR Defender driving from Norway all the way over to England via France you know, then all over the hills and far away, before heading back home the opposite way. I think the shop where it was bought is simply called Arundel Photographica, but I'm not 100% sure. 

Anyway, about the camera:
You may think the Trip 35 is as simple as they ever came out of the Olympus factory back in the days when these were made? If so, please take a tiny step back and have a closer look at the Pen EE-3. There is absolutely nothing there that needs to be adjusted as long as you manage to have your film loaded and the ASA adjusted to the right level (between 25 and 400). There's no focus or anything else to be bothered about, besides you got the option to override the fully automatic shutter/aperture combination to adjust the aperture manually if needed or if you just feel for it. 
That's it, actually. Everything else is nothing to think about. No focusing or no anything else. A true point and shoot with an optional manual aperture setting. How cool is that?

A stealthy little camera even though it's got the classic chrome appearance from back in the days. It's not shiny though, and there are no bells and whistles whatsoever inside this thing. 

The Pen EE series was introduced in 1961, and seem to have ended it's days around 1983 or thereabout. The EE-3 model discussed here apparently was on the market from 1973 to 1983 according to Wikipedia. 
We are as you know by now looking at a half frame, fixed lens, fixed focus, fully automatic selenium cell metered viewfinder camera. It doesn't get much better than that for a small camera, I'd say.
The fact it's "only" a half frame camera must be as good a reason as any to stay away from it you may think, and if you don't at the same time see all the good reasons for actually getting one you are of course right. Half frame is nothing for serious photography, that's absolutely very well observed, but then again photography can be so much more and there is absolutely no reason to be that serious all the time. Grab a tiny camera, throw in a roll of film and go have some serious fun while snapping all the things you normally would just leave be.

To me the small EE-3 is one of them perfect pocket film cameras when traveling light. It's tiny, it's built into a good old metal chassis, it gives you nice exposures without having to give it a second thought, it's pretty much invisible and it actually also have a quite good lens attached to it from the factory. No, it's probably not the most expensive construction ever made out of glass and a few plastic rings, but it does the job in a nice way. We are talking about nothing less than a 28mm f/3.5 Zuiko lens, which should be equal to something like a 40mm on a standard full frame 135 camera. So that's nice enough data for the lens, me thinks. I would of course like it to have one more stop available, but then again you can rarely have everything you want. 

The automatic exposure function on the camera is as simple as it is genius actually. There's supposed to be two different shutter speeds (1/125s and about 1/30s) built into the thing. The aperture sets itself to the right size according to available light measured by the selenium cell as you push the release button down towards the point of trigging the shutter. If the camera finds there's not enough light to get a decent shot, a physical "red flag" will show up inside the viewfinder, and the shutter will be locked. This can however be manually overridden if you wish, by using the manual settings on the ASA ring on the lens. Another cool thing is that this way you can also measure light in one spot by pressing the shutter halfways down to lock the aperture and the shutter time (AE lock), then move the camera to compose your picture before you press the button fully down to take your picture. It works like a breeze. 

Topside view. Film counter, the rewind crank and even a hot shoe in addition to the obvious release button. You also got a good view of the only adjustment possible to make, the ISO ring on the lens. 

Another quite cool thing about half frame cameras is of course the fact that you can squeeze a lot of tiny snaps out of one single 36 exp. roll of film a bit dependant on who actually made the film (as some like to throw in a couple of shots extra just for the heck of it). I think 76 or 77 pictures is my personal best using a roll of Fomapan some time ago. 
The huge backside of the half frame format is of course grain which is the obvious limit and sometimes a showstopper when putting the negatives inside a scanner or even the enlarger in the darkroom. You will soon discover that there is a limit on the size of paper you need to pull out of the stack to get a decent paper copy. On the other hand this is not the camera you would bring along if your mission is to make serious prints for huge walls with pin sharp details and such. We got other cameras for those pictures, we film wasters. 
Another no-brainer and a real kick in the butts to go grab one would be the price. My camera bought over the counter down in Arundel over in England cost me less than a roll of colour negative film. Not that I buy too many rolls of colour negative film, but that's a story for some another day. I payed nine pounds for it, and it works like a dream. 
Something of real value when buying used equipment would be the lack of plastic you would have to hack your way through to start using what's inside. It's extremely annoying, and the plastic seems to end up in the ocean anyway, so better avoid it if possible. I simply payed my nine bucks, slipped it inside my pocket and went out on the street before putting a film inside and started snapping away.

This is a camera for all those fun pictures, and not exactly for any serious business as I have mentioned well enough now. I would say it's even good enough for a trip into town to do some fun street snapping for those of you who like to play with that sort of photography. It's a lot stealthier than any more modern camera in need of batteries. The shutter is dead quiet and a roll of film goes a long way. There is no annoying sound as there is no motor installed to wind the film forward or backwards either. OK, the manual winding wheel do have a tiny bit of annoying sound if you're sitting inside a very quiet place, but out and about in the field no one is going to hear it or take notice. Even the lens should be of perfect length for street work I would think.
The negatives are only half the size of a standard 135 camera for sure, but what you loose in size you get back in mood and originality and loads of fun. And a bit of grain, yes.

You will not find anything you didn't expect when you turn it around to have a closer look at the bottom plate. There's the ever present release button for the winding mechanism, and the threaded hole to be able to attach it to a tripod. Not that you ever will do that, but they threw it in for the same price anyway. In my case you also have the film reminder. Quite useful if you load it up and put it on a shelf for a while. There's about 72 snaps on a roll you know...

There are even more good things to be said about the little Olympus Pen EE-3. There will always be room left somewhere to bring it along no matter where you go. If you're out shooting with other cameras there will always be a tiny bit of room left for this little thing to make you able to snap up a few frames on some location just for fun, or if you're going places where you first thought you would be better off without any camera at all, it's also the perfect one to simply slip inside a pocket before you run out the doors. 
Due to frame size and the forever on-going discussions and mentioning of grain out there on the forums these days, you might want to load this camera with quite low ISO film around the 100 mark. Personally I'm a bit more relaxed about all the fuzz and would just as often throw inside an ISO 400 film for that matter. I find 400 ISO to suit me better in the long run, as the light up in the northern latitudes can be a bit dull at certain times of year. 

So if you think you have all the cameras you ever needed and there's nothing more to wish for, you might have a go with the oh so lovely little EE-3 (or any other EE for that matter...) from Olympus. They are cool as heck, cheap as chips and also come with a huge load of fun factor already built into them. Something like 17 millions were made, so there should still be a few around ready for grabs. 
And if you still feel you got enough cameras, you may have a son or daughter wanting to try something simple just to start off somewhere? The Pen EE-3 would be perfect for that as well.


All pictures of camera above was shot out here at sea this afternoon using an old iPhone. 
All example snaps below has been taken with the above camera. 
My film scans sucks as usual, but that's what you get from me. You should know that by now anyway. 

Oh yes, we were there! In the midst among the crowds, fighting to get a glimpse of the pile of stone at the end of a bridge. OK, it's a lovely old pile I admit. I might pass again some other time, but at a different time of year. 

I got absolutely no idea where this might be. It's in Scotland for sure, maybe somewhere out on the Isle of Skye, but could be anywhere over there I'd say.

I'm pretty sure this is somewhere on the east coast of Scotland. Somewhere in Aberdeenshire if my memory serves me just a tiny bit...?!

Sea cave, east coast of Scotland

Outside a sea cave, east coast of Scotland